
First attempt at making ballast molds

For the past few weeks, I've been tinkering on making some male-molds for future ballasts. I've 3D printed two male-molds for Sun Wind HF style torpedo bulbs, one slightly smaller than the other to make a lighter weight bulb if desired. And then also I've worked on a shaped ballast mold for the current Wampum VM that I'm building.

Today, I finally took a big gulp and filled the molds full of refractory cement. Now I'll let it cure for a few days and then attempt to take off the molds and see how they look. Then I'll let the cement cure for a few weeks, occasionally in a warm oven, to fully cure before I attempt to pour lead in them.

Here are two pictures of the molds in boxes that I framed around them. They have also been smeared liberally with Vaseline as a release agent. 
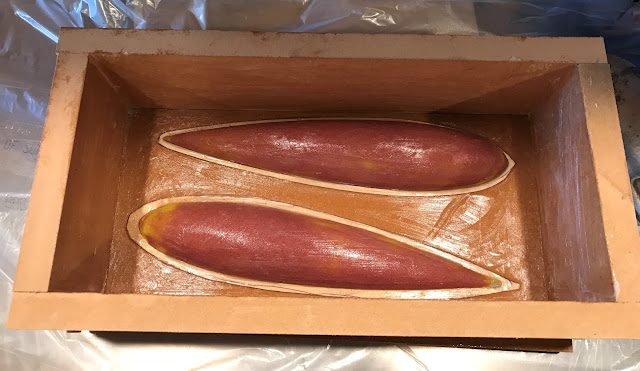
Sun Wind HF RC sailboat lead bulb torpedo

I'm going to wait several days before trying to remove it. Gulp...
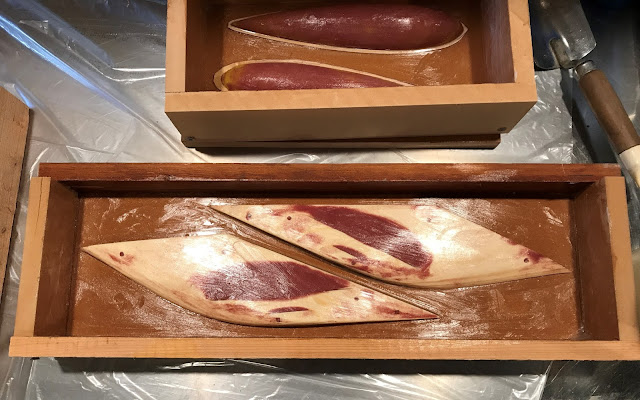
Wampum VM RC sailboat lead ballast

Here are the two molds after being filled with refractory cement. I bought a 25 lb. tub and used it all. It didn't go far, but I had just enough to do the two. I hope that they are thick enough to support their own weight when cured.
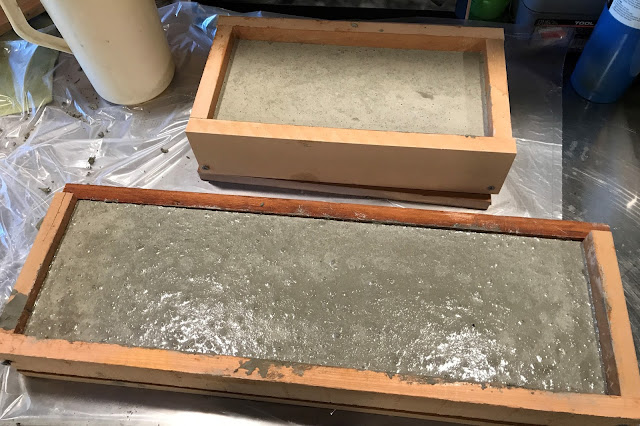
RC sailboat lead ballast bulb molds

More later after they have a few days to cure and I try removing the molds. Ugh...


Peace!


Comments

Popular posts from this blog

1934 America's Cup Rainbow J-Class RC Drawing

At some point I would very much like to model a vintage America's Cup yacht. The one I've been most interested in lately in the 1964 winner Constellation. But this past week I was sent a 1/16 scale drawing of the 1934 Rainbow. It's a beautiful drawing! Full sized so it's very large. I have been working on making it into a 3D model, but as is true with most hand-drawing lines, none of the lines from one view match up with the lines from the other views. For example, I spent a lot of time tracing the "sections" view so I could make stations. But when I tried to match them up with the plan/deck view or the waterplanes view, none of the lines met. Some came close, but all had to be adjusted. Then, once they are matched to the deck and keel lines, it's obvious that the hull is not fair. I honestly doubt that the hull would be fair if you simply used the station lines as originally drawn either. Back when they made these boats, they put it on the actual bu...

IOM Rig Box (IOM Sail Box) plans

So all the cool IOM kids seem to have nice wooden boxes to store their rigs in. This might be my next quick project then, so that I can pretend to be cool too. :-P The rig box images that I've seen online are mostly similar, and would work well, but David Jensen from Bellevue, WA, USA (The same guy who designed a fantastic IOM boat stand I posted about earlier) has a really nice design that he shared on RC Groups . Or if that link doesn't work, the go here and search for " IOM sail box " or " IOM rig box ". It holds three sets of rigs for the A, B, and C rigs. He also has a nifty way to attach his IOM boat stand, with a boat on it, to the rig box. His rig box has wheels attached, so once everything is loaded up he just wheels it to the launch spot. Very nice! There are other sources online. They show different variations of the same type of sail box. Here's a nice looking one . Here's a YouTube video of a really nice one . Wil...

Made a Mast Crane

Made a mast crane based on one that I have made in the past for my Star 45's. Works well for them, and should work well for a Vintage Marblehead Sun Wind. It's made from brass, with a bar for strength soldered to the top. The idea is that a slot will be cut into the top 2" of the mast, and the crane will be through-bolted. This link is to the original schematic of a mast crane that you can build yourself, courtesy of the Miami Valley Model Yacht Club in Ohio.  Here is my updated version. Click to see the full-sized image and then copy and paste it into Word. It "should" print at just about the correct size, but you may have to adjust the image a bit. Cut it out and spray glue it to some brass sheet. Cut it out on a band-saw and then sand smooth. Be careful when working with tools and metals!! This is what I ended up with for my Sun Wind HF. I decided to reinforce the crane with a length of brass bar soldered to the top edge. Back to deck pl...

IOM Sailboat Stand

I made an IOM boat stand! The plans are from David Jensen in Bellevue, WA, USA. I found the plans through someone else's blog here , and a model sailboat club from Australia here . It was pretty straightforward to build. My only contribution to the design is that I laser cut the cradle out of 1/8" Lite Ply. I made eight copies, and then epoxy laminated two sets of four each. Turned out really well. If you wish to laser cut your own set, here is my DWG file . You'll have to have your own laser cutter, or send the job to a laser cutting company like National Balsa . Here are the original plans , and here are the original plans for just the cradle . Thanks to David Jensen!! Note that in the picture below, my boat is not finished! Yikes. You can't see it in this image, but there's a small chuck of self-stick foam behind the bulb to protect the bulb. I'll eventually incorporate some Velcro or a strap of some sort to hold the bulb in place so...