
Today I finally made my first attempts at casting lead bulbs and ballasts, and it turned out well!
Over a month ago, I made some female molds out of refractory cement. They are now fully cured.
One mold was for torpedo style bulbs for the Sun Winds and Rip Tides. It has two slightly diffferent-sized bulbs in it. The molds I made seemed to just miss the sweet spot. I made one slightly smaller than the other in the hopes that one of the two molds would produce a 4.5 lb. half-bulb for a 9 lb. total bulb. The smaller mold turned out a 3 lb. 5 oz. half-bulb, and the larger one turned out a 4 lb. 14 oz. bulb. However, I think I over-poured the larger one, and if I take better care in my pouring I think it would make a 4.5 lb. half-bulb. So I'm really close!
Yes, I made "half bulbs" instead of a solid bulb with a slot in it. My system for mounting the bulbs is to have an thin inner-core of plywood that the two halves mount onto.
I also made ballast halves for the Wampum VM. They turned out OK but needed a lot of clean-up. They also seemed to have some bubbles in them somehow. Not sure what I did to cause the bubbles. Too hot? Too cool?
Many, many thanks to Rod Carr for loaning me the casting equipment and supplying the lead! It worked perfectly. Thanks Rod!
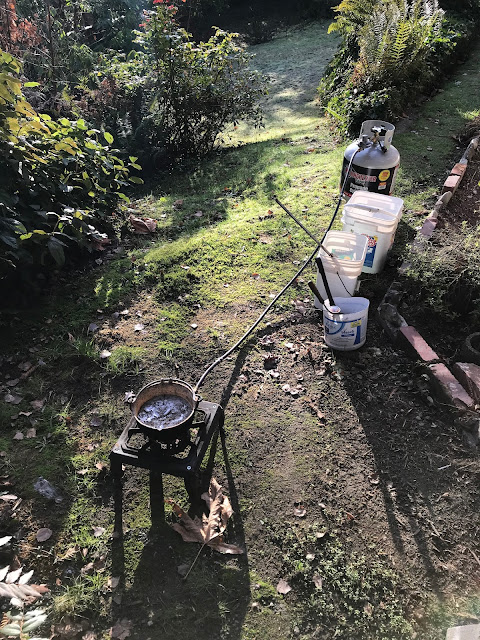

I started earlier in the day by putting the cured concrete molds in a COLD oven and then turning it on to 150 and letting it heat up so that the thermal shock of the molten lead would be less likely to crack them. I used refractory cement which should be able to handle it, but just wanted to be sure.
I brushed on a good amount of talcum powder as a release agent. Worked really well.

Here is my second attempt at the Wampum VM ballasts. Turned out OK.

Below is my second attempt at the Sun Wind HF/Rip Tide HF torpedo bulbs. This one weighs 4 lbs. 14 oz. That may be a touch too heavy, but I think I can now pour one that is closer to 4.5 lbs. for each half-bulb.

Here is how the ballasts will fit onto the Wampum VM keel. They'll need some cleaning up and a lot of filling, but should work just fine. Together they weigh about 11.5 lbs. The original called for 12.

Aloha!
Over a month ago, I made some female molds out of refractory cement. They are now fully cured.
One mold was for torpedo style bulbs for the Sun Winds and Rip Tides. It has two slightly diffferent-sized bulbs in it. The molds I made seemed to just miss the sweet spot. I made one slightly smaller than the other in the hopes that one of the two molds would produce a 4.5 lb. half-bulb for a 9 lb. total bulb. The smaller mold turned out a 3 lb. 5 oz. half-bulb, and the larger one turned out a 4 lb. 14 oz. bulb. However, I think I over-poured the larger one, and if I take better care in my pouring I think it would make a 4.5 lb. half-bulb. So I'm really close!
Yes, I made "half bulbs" instead of a solid bulb with a slot in it. My system for mounting the bulbs is to have an thin inner-core of plywood that the two halves mount onto.
I also made ballast halves for the Wampum VM. They turned out OK but needed a lot of clean-up. They also seemed to have some bubbles in them somehow. Not sure what I did to cause the bubbles. Too hot? Too cool?
Many, many thanks to Rod Carr for loaning me the casting equipment and supplying the lead! It worked perfectly. Thanks Rod!


I brushed on a good amount of talcum powder as a release agent. Worked really well.

Here is my second attempt at the Wampum VM ballasts. Turned out OK.

Below is my second attempt at the Sun Wind HF/Rip Tide HF torpedo bulbs. This one weighs 4 lbs. 14 oz. That may be a touch too heavy, but I think I can now pour one that is closer to 4.5 lbs. for each half-bulb.

Here is how the ballasts will fit onto the Wampum VM keel. They'll need some cleaning up and a lot of filling, but should work just fine. Together they weigh about 11.5 lbs. The original called for 12.

Aloha!
Comments
Post a Comment