While waiting for epoxy to cure on my Sun Wind II mock-up hull, I've finally been working on making a 3D model of the 1949 Rip Tide. I started with some curves that were drawn in AutoCAD by a gentleman named Roger.
For now, I'm simply calling it the Rip Tide II.
After a false-start a few months ago, I now have a nice 3D model that is almost ready to create some laser cut frames.
Here's an update...
First, these are the lines that Roger made based on the original lines. I've seen the original lines that are going around the internet, and they are pretty crude. So Roger did a great job!

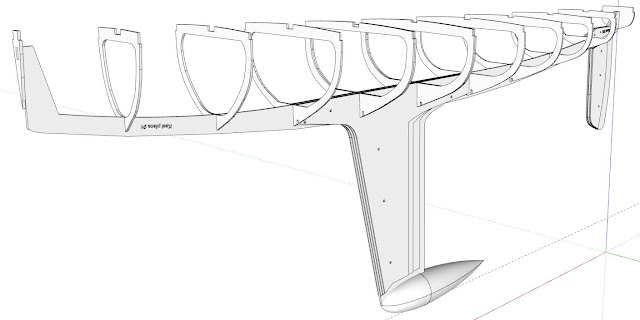
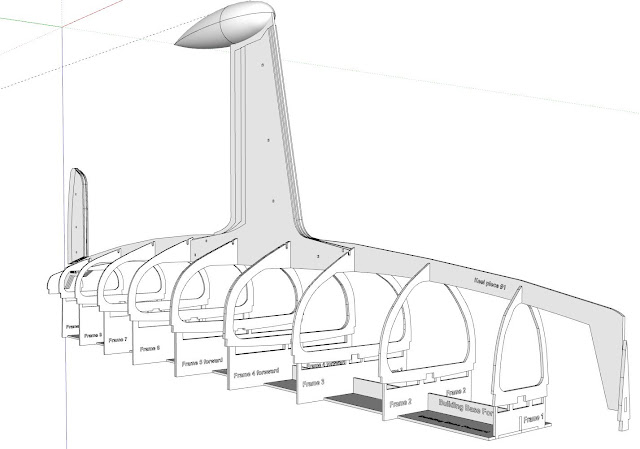
Then, from Roger's 2D CAD drawing, I have made a 3D model so that I could test the fit of all the parts and frames. I've also made changes to the design to make the Rip Tide a "High Flyer" RC sailboat. So I dropped the draft to 16" and added a spade rudder.
Here is what it now looks like...
I also built a building base for the frames to help with alignment, and to hold the frames in perfect position. The building base can be made of balsa or lite-ply.
More later!
Peace!
For now, I'm simply calling it the Rip Tide II.
After a false-start a few months ago, I now have a nice 3D model that is almost ready to create some laser cut frames.
Here's an update...
First, these are the lines that Roger made based on the original lines. I've seen the original lines that are going around the internet, and they are pretty crude. So Roger did a great job!

Then, from Roger's 2D CAD drawing, I have made a 3D model so that I could test the fit of all the parts and frames. I've also made changes to the design to make the Rip Tide a "High Flyer" RC sailboat. So I dropped the draft to 16" and added a spade rudder.
Here is what it now looks like...
I also built a building base for the frames to help with alignment, and to hold the frames in perfect position. The building base can be made of balsa or lite-ply.
More later!
Peace!


Comments
Post a Comment