The electronics for my upcoming RC sailboat build have all arrived, and I've also finished 3D modeling the electronics & servo tray/board/thingy that everything is mounted upon. My servo tray is designed to contain the two servos, and the other electronics, on a removable tray/board/thing. What exactly is it called, anyway?!
The hookups for RC sailboat servos and electronics are about as simple as anything can get in the RC world.
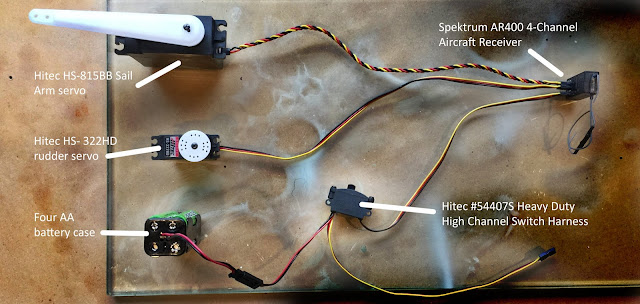
Everything plugs into the RC receiver. I'm using the Spektrum AR400 4-channel aircraft receiver.
The sail arm servo is plugged into the throttle receptacle on the receiver. I'm using the Hitec HS815BB Sail Arm servo. It's huge, and not particularly fast, but it should be plenty strong enough. I'm not racing so I don't care about the speed of it.
The rudder servo is plugged into the aileron receptacle on receiver, and NOT the "rudder" receptacle. I'm using a Hitec HS-322HD.
Plug your battery switch into either the "rudder" or "elevator" receptacle, not the "Bind/Data" receptacle. You can actually use any unused receptacle except "Bind". I'm using the Hitec Heavy Duty High Channel Switch Harness (HRC#54407S).
Plug the battery case into the switch. The servos I'm using are only rated up to 6 volts, so I'm just going with a battery case that holds four AA batteries. If you use servos that have higher voltage needs, then you might go with a Lipo battery instead.
And that's it! Of course, you'll have to bind your receiver to your transmitter too. See picture of the servo hookups below:
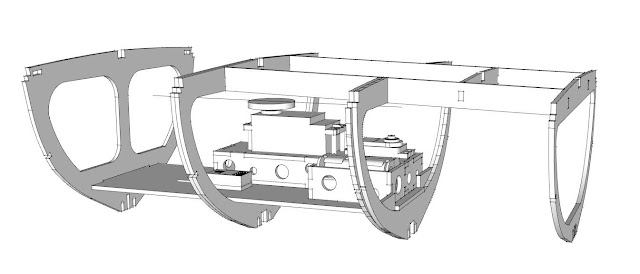
Here are some updates on how the 3D modeling looks. Here is the servo & electronics board. You can see that I've built a box to contain the servos and the battery case. Most of the wires will be routed through the box too, except for the battery case wire so that you don't have to remove the entire board to change the batteries. You should just be able to pull out the case.
Next is the board inside the frames. You can see the hatch cutout too. The board should easily slip out when needed... fingers crossed!
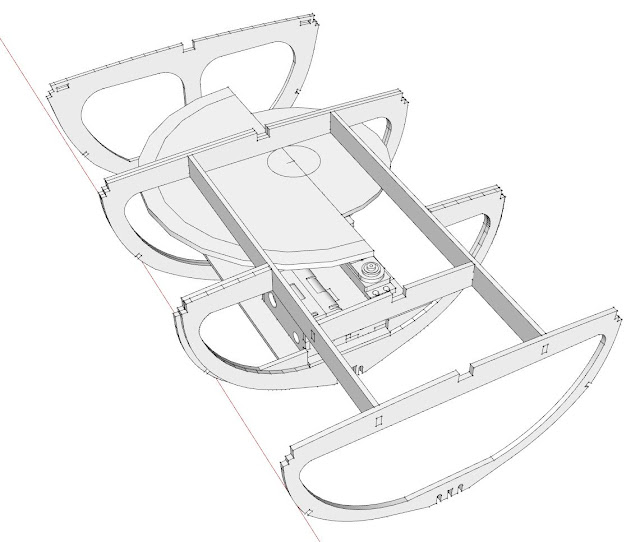
Finally, I added two half-circles to illustrate the sail arm sweep. By doing this you can easily see if anything is in the way of the arm, and that the arm can sweep through its entire range inside the frames.
That's it for now!
Aloha!


Comments
Post a Comment