The sails arrived and they look amazing!
Thanks to Rod Carr, of Carr Sails. He does very nice work. And he is more than happy to work with you too. He truly wants you to like his sails, and he wants his sails to both look good and perform well. Use him for your next set of sails. He's threatening to retire from sail making in the next few years, so either get your sails soon or try to convince him to stay in the game.
Here they are mounted to the mast and laid out for measuring with the spars.
They are attached using a "jack wire" system. Small brass cotter-puns are glued into holes every 6" down the aft side of the mast.
Then you lay out the sail next to the mast and carefully cut small windows out of the luff of the sail at each cotter-pin. You leave a small amount of room both above and below the cotter pin for the sail to stretch as you apply downhaul.
Then you run stainless steel wire through the mast crane and crimp it on. Now carefully route the wire down through the luff of the sail, and wherever you meet a cotter-pin, you run the wire through it and then continue down back into the luff.
You end up with these all down the aft side of your mast. It holds the sail well and allows it to swing very freely:
Sail Number Application:
Applying the sail numbers can be a tricky challenge. I'm using adhesive-backed insignia cloth that I cut out with the laser cutter. The edges aren't that great, but they'll look fine on the sail.
The trick is to leave the numbers on the backing, and instead pull off all the excess material around them. This way they stay perfectly positioned to each other too.
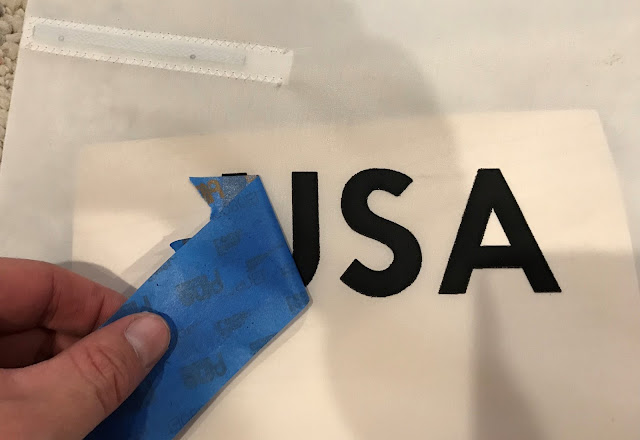
Then take some tape and cover the numbers. When you pull off the tape, the numbers will come with it. Then you carefully position the numbers where you want them and press down. Be careful to not touch the letters to the cloth until you're completely in position because they stick very well and can't usually be repositioned.
Then simply pull off the tape and... Voila!
The Vintage Marblehead insignia...
The original jib boom that I tried was just too small, so I made a new one and it is being laminated as I write this.
Over the next few days I should be able to complete this boat, and then... go sailing!
Aloha!


Comments
Post a Comment